HOW-TO: Getting VNC Server to work with Comodo Free Firewall + Antivirus for Windows
In this brief HOW-TO I will explain the steps necessary to get the popular VNC Server working on a Windows computer which has Comodo Free Firewall + Antivirus for Windows also installed on it.
Getting Started:
First you will need to open the Comodo Free Firewall + Antivirus for Windows interface, click Firewall at the top, click Advanced on the left hand side of the window, next click Network Security Policy, click the tab for Global Rules, then click the Add button to add a new rule. Below is the window adding the new rule, with the first page of details already filled in:
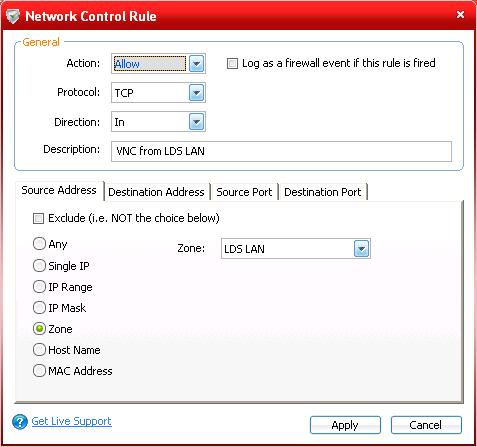
Set the following details on the first page:
Protocol: TCP
Direction: In
Description: VNC from {Network Name}, where {Network Name} is one of your named Network Zones
Click the radio button for Zone, then pick the same {Network Name} from the Network Zone list which appears
Next click the tab named Destination Port:
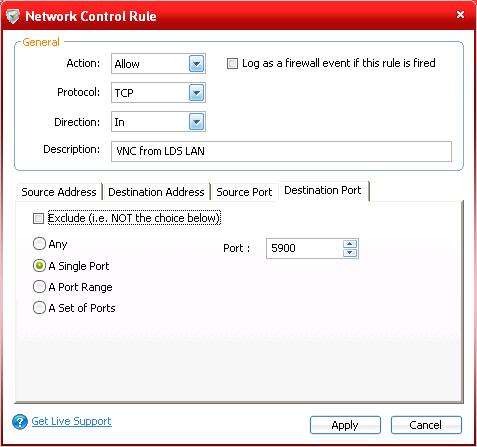
Select the radio button for Single Port, and fill in 5900 as the port number.
Click the Apply Button. Next drag and drop the new rule you just created to the bottom of the Allow rule list, which are all of the green check mark rules, as shown here:
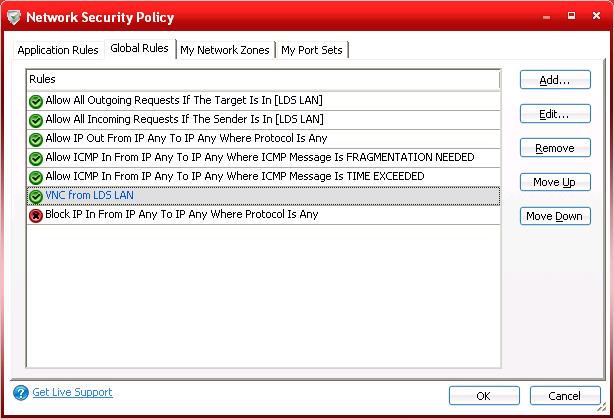
Then click OK at the previous Network Security Policy window to have the new rule take affect.
Try it out!
From a remote computer on the same network you set your rule to allow VNC connections from, use VNC to connect to this Windows computer. You will receive an authorization request on the Windows computer, which looks like this:
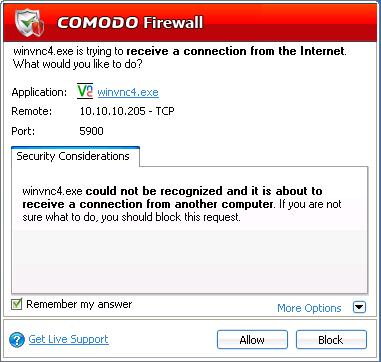
Simply click Allow, and be sure to have the "Remember my answer" box checked. Then from the Guest side, you should get the expected password challenge, and once past that you should be able to remote control the Windows machine from the Guest computer.